The NI C Series of Sound and Vibration Input Modules can be used with both accelerometers and microphones to collect vibration and acoustic signals. These signals can then be used for audio testing, monitoring machine conditions, and to determine NVH (noise / vibration / harshness). An incredible asset to any project, these modules aid in quickly and easily measuring sounds and vibrations. However, the amount of options and possible combinations can be confusing! Thankfully, there are a few key factors to keep in mind to help narrow down the choices and find the right microphone or accelerometer to fit your needs.
Choosing the Right Microphone
Measurement microphones have three distinct categories: free-field, random incidence, and pressure field. The higher the frequency, the more these three differ.
Location, Location, Location
The primary factor you want to take into consideration when choosing a measurement microphone is the location. Where will you be operating it, and in what conditions?
> Free field microphones work best in large, open areas that are free from echos or reflective surfaces.
> Pressure field microphones are ideal for measuring the sound pressure in smaller enclosures, on walls, or inside structures.
> Random-incidence microphones work in places with hard / reflective surfaces and walls because they take in sound coming from all angles. They are very similar to pressure field microphones, and are not used as often.
Decibels and Range
The scale of decibels (dB) was devised because pascals, which express pressure in numbers, are typically low and difficult to control. The maximum decibel level of a microphone is based on its physical attributes and design. The highest decibel level which a microphone produces in any given application relies on the voltage used, and the sensitivity of that specific microphone. Calculating the pressure (in pascals) that the microphone can withstand is necessary before determining the maximum output. This can be done using the formula:
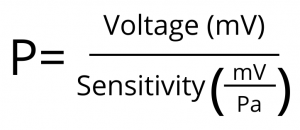
Where “Pa” is pascals, and the voltage is the peak output voltage of the preamplifier.
This can then be converted to decibels using the formula:
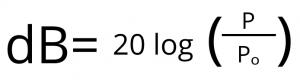
Where “P” is the pressure (in pascals), and “Pₒ” is the reference pascals.
The Frequency Range
Another important factor to consider when choosing your measurement microphone is the frequency. The smaller of a diameter a microphone has, the more equipped it usually is to pick up on high frequencies. Therefore, microphones with a larger diameter are able to detect low frequencies. Many manufacturers include a ± 2 dB tolerance when calculating the specifications of a microphone’s frequency.
NI is a partner of the Denmark-based manufacturer G.R.A.S., who provides a selection of microphones and preamplifiers that are certified to be compatible with Sound and Vibration Hardware from NI. These are listed in the chart below:
Choosing the Right Accelerometer
When it comes to accelerometers, there is definitely a diverse selection to choose from. The most important things to consider when selecting one to fit the needs of your project are the factors from the signal you are measuring and the surrounding location.
Sensitivity and Frequency Range
One of the most crucial factors for an accelerometer is the sensitivity, which indicates the change between vibration and voltage with a reference frequency. To ascertain how frequency causes sensitivity to vary, a thorough calibration must be performed throughout the whole frequency range.
Generally speaking, strong amplitude signals should be measured using a low sensitivity accelerometer, and low amplitude signals should be measured with a high sensitivity accelerometer.
Accelerometer Weight
The accelerometer you choose should weigh no more than 10% of how much your signal source weighs. Why is this important? Because added mass to the structure that is being monitored can alter the vibrations and result in incorrect data.
How Will it Be Mounted?
How the accelerometer will be mounted to the surface of the target is another important consideration. There are four unique methods, each with their own frequency limits.
> The handheld method has a 500 Hz frequency limit
> Magnetic mounting has a 2,000 Hz limit
> Adhesive mounting has a limit range from 2,500 to 5,000 Hz
> Stud mounting had a limit that is over 6,000 Hz.
Of these options, stud mounting is generally the most effective, but it requires drilling into the target and is often installed permanently.
Additional Information:
https://www.grasacoustics.com/